
Goodwin professionals are always available to answer your questions. We also provide literature and resources to help ensure your floor is properly installed and professionally finished. Maintenance and refinishing are important as well!
Install Your Floor
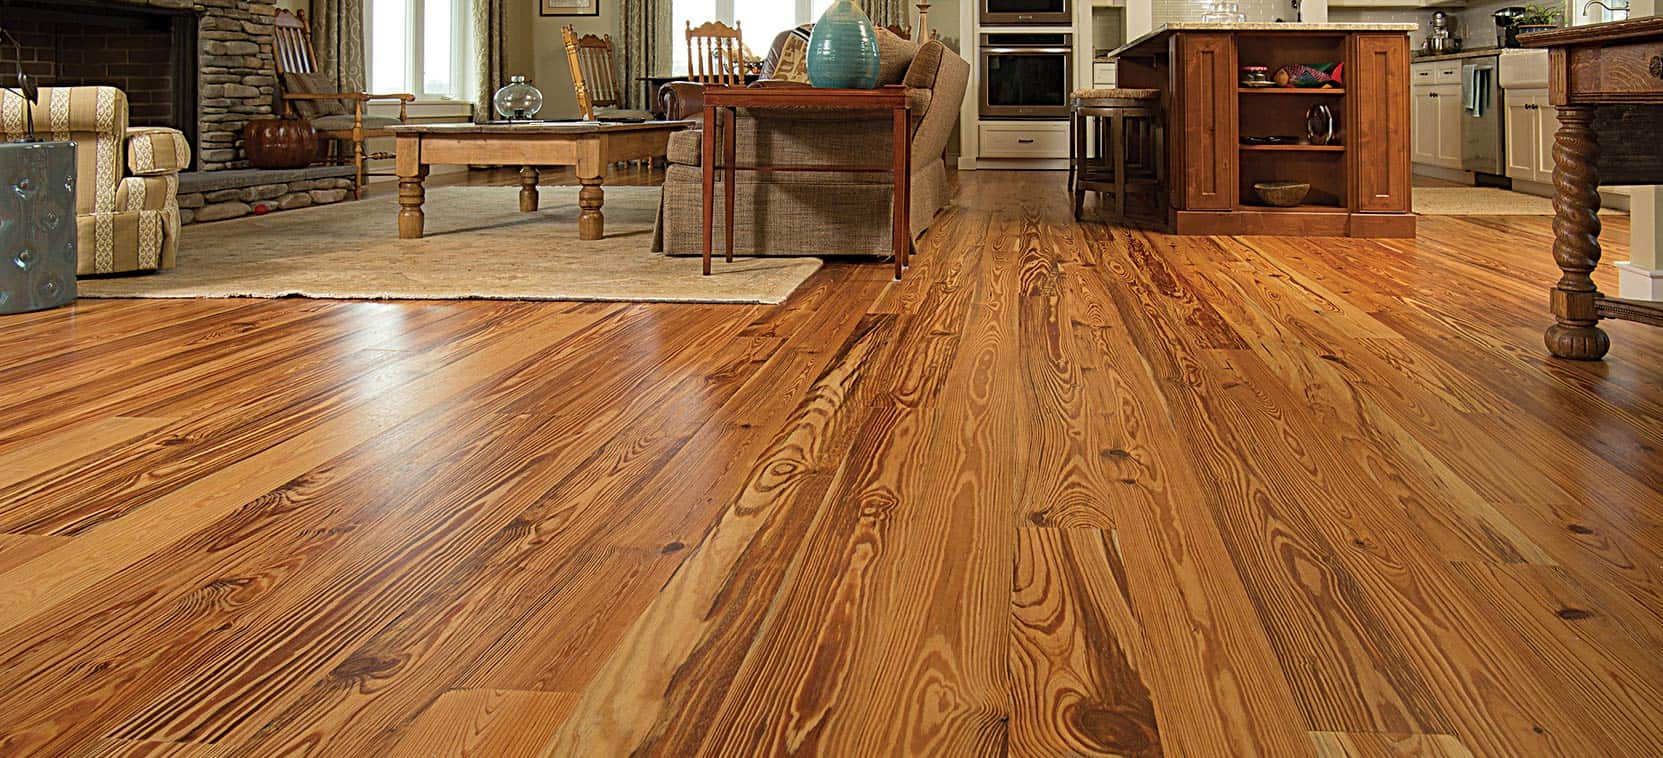
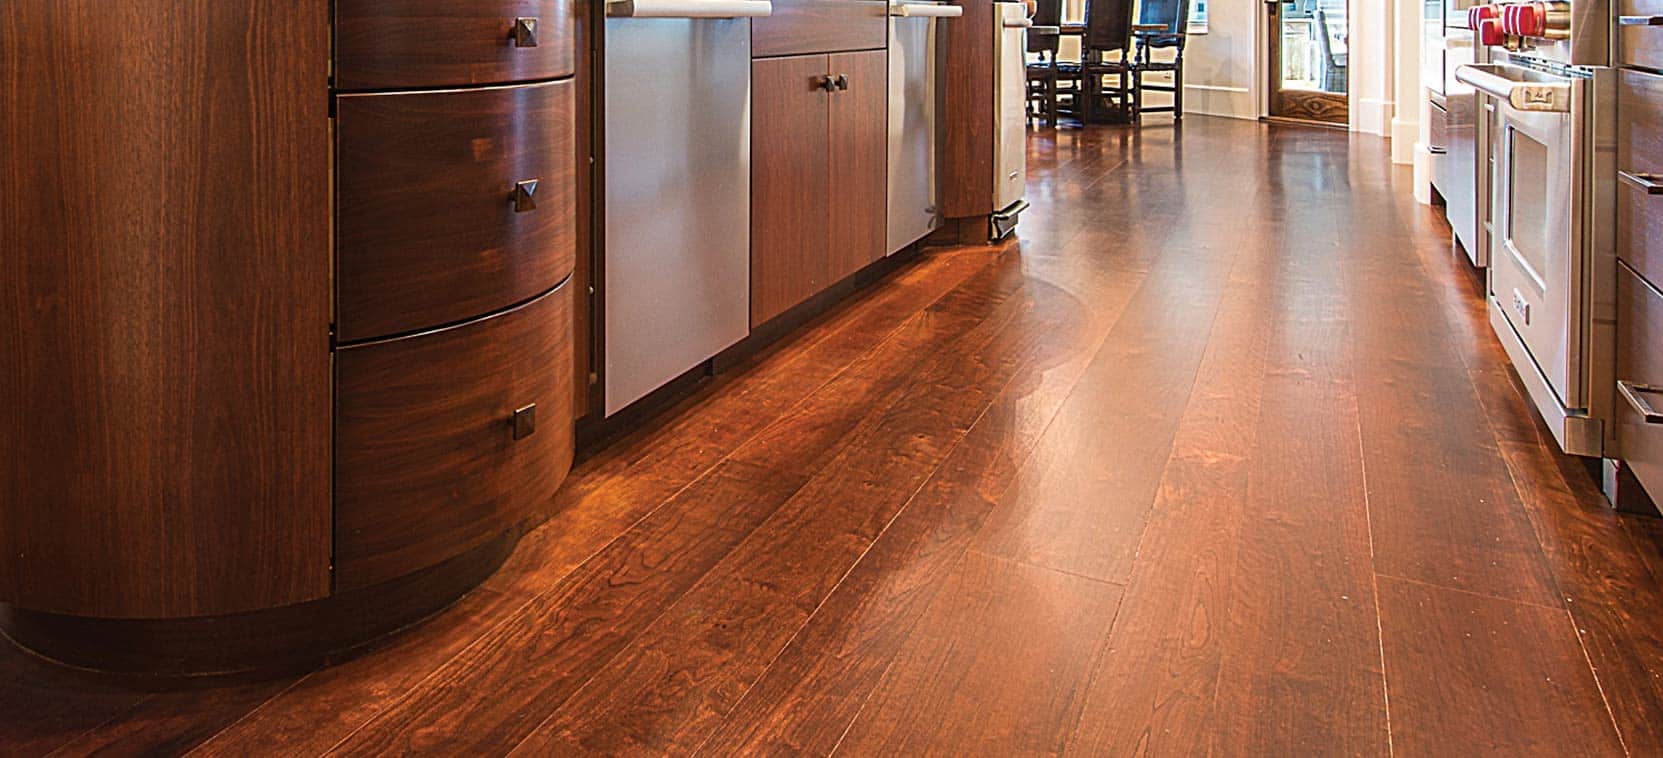
Now that you have made the decision to install heart pine, you are ready to go. Some suggestions we feel might come in handy throughout the process are included in this section. Please click on any of the headings for useful information on everything from site preparation to sanding and finishing your new hardwood floor.
The subfloor: Your wood floor’s foundation
Nearly all squeaks and cracks can be directly traced to an inadequate subfloor. A sound subfloor is the crux of a sturdy floor. A plank subfloor should be at least 6″ wide boards installed diagonally to the joists. When installing a plywood subfloor, 3/4″ exterior grade is recommended if your finished flooring is 3/4″ thick. If wood flooring is installed over concrete, check for wetness by taping down a square yard of plastic for 72 hours to see if condensation forms. Once dry, you can install a joist system or just a grid of pressure-treated lumber (screed system) over the concrete. Align the edges with the joists for strength and stagger adjacent rows four feet. You can even cut the plywood into 4′ squares to create a smaller area over which each panel can move. Nail every six inches along each joist with 8D or larger nails. You can use adhesive before nailing to further reduce movement and possible squeaks.
If you choose to put in a sleeper (or screed) system over a concrete slab, dry pressure treated 2x4s are preferred. These should be 18″ to 4′ in length and staggered on centers with an air gap on all overlap joints. Lay them perpendicular to the direction of the finished flooring and secure them with T-nails staggered side-to-side 4” to 6” apart.
Leave expansion joints of at least 1/8 inch between each panel, section, or board of the subfloor. Research has shown that two or three years after the floor is installed the subfloor will measure 2-3% higher moisture content than the floor. The subfloor has less access to heating and air conditioning than the floor, and will expand slightly from the additional moisture.
Use a 6′ to 10′ straightedge to check the subfloor for high areas, and sand any high spot so the subfloor is as flat as possible. Next put down rosin paper carefully butt-edged, not overlapped. The rosin paper reduces the chance of squeaks and helps circulation around the floorboards.
Humidity
First of all, heart pine, like any wood, is a natural product. It is made up of tiny cells, which take on or give off water with moisture in the air, and will therefore shrink or expand somewhat with changes in relative humidity. The humidity levels inside a building will vary with heating or air conditioning seasons. As the humidity varies the dimensions of floorboards and any wood products will also change slightly.
Relative humidity in the dwelling should be stabilized at 40-60 percent. Be sure the drywall and sub-floor of the house are dry prior to installation. If the newly installed floor absorbs moisture from its surroundings it will expand and compress, but it will not decompress to the full dimension once the site dries.
Here’s how to best preserve your wood floor and all fine wood:
- Turn the thermostat to your typical setting about three weeks before the flooring is due to arrive with all outside doors and windows in place. This will help to stabilize humidity levels between 40% and 60%, and establish an ambient temperature of between 50 degrees and 90 degrees Fahrenheit. It’s ideal to maintain these humidity and temperature conditions as much of the time as possible throughout the life of the building.
- Some buildings may need a humidifier to maintain a healthy humidity level and prevent excess shrinking of the building materials.
- Beware of leaving a house closed up with the air conditioning off during summer months when excess humidity may get trapped inside the house.
- Season all concrete, mortar, and plaster areas a minimum of 60 days. You can check if concrete is dry by using a few drops of phenylthalene (available at most drugstores). Or you can use a vapor barrier test. Tape a 3’ x 3’ piece of 6 millimeter poly-film securely to the slab. Allow this barrier to remain secured for 72 hours, then remove and check for moisture under the film.
- Check that crawl spaces are dry and well cross-ventilated. Even an old house can have moisture in the slab or water under the house. All that is required for these conditions to occur is for dirt to be piled up around the slab for landscaping or for the ground under the house to be lower than the ground around the house.
- Direct rainfall or excessive moisture away from the structure with surface drainage. Good drainage is a 3″ or greater slope per every 10 feet. Build up the ground level under the house so that it is higher than ground level around the outside of the foundation of the foundation.
- If you do have the potential for moisture intrusion from underneath the flooring, the treatment may be as simple as a layer of plastic taped under the building or between the slab and subfloor. Tape the plastic anywhere there are seams. Be sure not to pierce this vapor barrier with nails or staples when installing the floor.
There are many, many solutions to moisture intrusion depending on the type of construction and area of the country. For example, some of the oldest houses in southern Florida were built without any subfloor to provide maximum circulation for the floor. This is an extreme example and requires the best drainage and planning. We do not recommend it, but it serves to demonstrate the diversity of options that are available if you investigate the natural construction techniques for your location.
Acclimation
Ideal acclimation time is two to four weeks, with a seven to ten day minimum. Air temperature and humidity conditions that will exist throughout the life of the structure should be established well before the flooring arrives and left on during the entire acclimation time.
When delivering wood flooring to the site, do not unload in the rain, drizzle, snow, or extremely moist weather. While the wood is acclimating, it should be stacked so that air can circulate around each board. Use a good quality moisture meter to check your floor. Be sure the floor and subfloor are within 2% of each other’s moisture content at installation. The moisture content should be consistent board to board and section to section within 1-2%. If there is a variation of more than 2% in the moisture content of the more dense boards from the lighter boards, this is one sign that the floor may not be fully acclimated.
Moisture
Check moisture content with a high quality, accurate moisture meter. The floor should measure 8 to 14 percent in most conditions and the floor and subfloor should be no more than 2 percent difference at installation. However, the moisture content of the floor should match the relative humidity of the environment in which it will be installed. If your indoor living areas are outside the range of 8 to 14 percent, you may want to consider special measures: additional acclimation time, a vapor barrier, or perhaps a humidifier or dehumidifier.
Site Preparation
All concrete, plaster and mortar projects should be seasoned at least 60 days before delivery of flooring materials. Always test concrete for moisture regardless of how long it has been poured. Check basements and crawl spaces to be sure they have good cross-ventilation. Wood floors require 1 1/2 square feet of ventilation per 100 square feet of floor. Surface drainage should direct rainfall or excessive moisture away from the structure. Keep sprinklers from spraying on the house around wood floors.
Plan the Layout
Take time to plan the layout of your wood floor so that the last few boards don’t have to accommodate all of the difference for an out-of-square room. Maintain a 3/4″ gap around the edge of the room. Never “zero-fit” the floorboards to the room. The floor must be able to expand in all directions without any pressure.
You can often hide any differences in dimensions around the room gaps around the edges of the room. Or you may be able to hide a tapered floorboard under a counter or along a wall that is not immediately noticeable when you first walk into the room.
Consider any special treatments such as “framing” doorways, fireplaces, masonry, or other protrusions into the room with wider boards and decorative effects. You can turn decorative boards perpendicular to the floor, screw and peg them, and join them at the corners with a 45-degree angle instead of a butt joint.
Board Selection
Select several straight boards for the first and last few rows. Some boards are naturally more crooked than others, and you can pull them into place easily when working in the middle of the room. The simplest way to get a crooked board into place before nailing is to drive a screwdriver into the subfloor for leverage. However, it’s easier to work with a straight board while you’re pulling up near the wall.
Laying the Floor
Lay the floor perpendicular to the joists if possible. If you decide to lay it parallel to the joists you’ll need an especially strong subfloor. Small marks at the base of the wall help locate the joists during installation. Stagger flooring during installation so that the end joints are at least 4″ to 6″, or farther, apart in any direction.
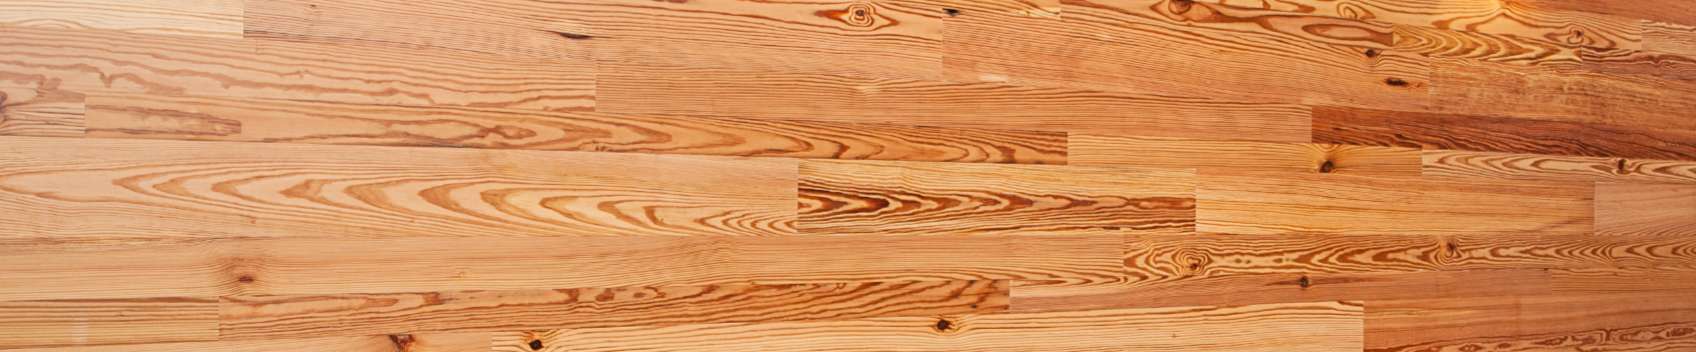
It is not necessary to end-match heart pine. Oak is often end-matched because the average board is only 2-4′ long. A heart pine floor usually averages 6-10′ boards. There will be some shorter pieces, but these can be mixed in or used at the walls.
Many professionals suggest that installation begin in the middle of the room. Flooring expands in the direction of the tongue, so any movement as humidity levels change will be from the center out instead of across the entire width of the floor. Use a center spline between the two facing grooves of the center boards. Others suggest that you install from one wall to the other, left to right if you are right handed. All agree that power nailers are faster and diminish the chance of hammer marks on the floor.
Always maintain a 1/2″ to 3/4″ air gap around all walls or protrusions. The floor must be allowed to expand without any pressure. You can cover the gaps easily with base and matching shoe moulding. Base and shoe moulding is usually nailed to the wall instead of the floor. Leave room for a business card (a very slight air gap) to slide on top of the floor and under the moulding. Undercut doorjambs for flooring to slide under.
Finish Your Floor
Finishing normally begins about 7 to 14 days after installation. This gives enough time for the installed floor to react to the environment. Slight cracks and any raised edges that are going to develop will have done so by then, and you can fill and sand them for the best possible appearance. Longer periods of exposure may subject the bare wood to job-site abuse and moisture.
For starters, heart pine is naturally hard and dense, and the new polyurethane finishes offers increased protection wherever you install your wood floor. But there is a lot of technical know-how needed for polyurethane or any other hardwood floor finish. The finish industry is evolving rapidly to meet strict new regulations and the increase in demand for wood floors. If you have further questions, telephone numbers, books, and articles are listed in the back of this guide, all of which provide more detailed information.
Sanding
Just like site conditions are to installation, good sanding techniques are critical in finishing. If the sander leaves swirls or grooves these will become more noticeable once the finish is applied. Sanding creates a lot of dust. Wear a respirator, ear plugs, and shoes that do not hold dust in the soles or leave scuff marks.
The job takes at least a couple of different machines. A drum sander is used to level the floor, and a disc sander to “screen” (or lightly sand) between each coat. You might want an edger, a small floor sander that lets you get close to walls, or you can sand these hard to reach areas by hand. A professional floor finisher will have all of these machines, or you may be able to rent them from your local hardware store.
Seal off doorways, vents, and built-ins by taping plastic over them. Just before sanding remember to check for loose boards or squeaks and repair them with screws from underneath the subfloor or nail through the floor into the joists. Set any nails at least 1/16″ deep and fill the holes with wood putty.
Operating a drum sander takes some practice. The machine is heavy but has to be moved along with a relatively “light” touch. If held in place for even a few seconds it will leave a dent in the floor. Sand in rows in the direction that the floor runs from left to right across the room. The drum sander takes a slightly deeper cut on the left side to allow you to feather the edge on the right side as you move over to the next row.
Turn on the machine and move forward as you lower the drum to the floor so it does not dent the starting spot. You do not have to bear down at all. About one foot away from the wall, lift up. Put the machine down again as you begin to move it backward over the same row. When you reach the spot where you started, lift up and move over 2–4″ for each succeeding row.
The first “cut” (sanding) is to level the floor. Use a drum sander with coarse-grit (20-36) paper. Fill any nail or peg holes and sand again using medium-grit (50 to 80). Check for any more blemishes and fill them before the final sanding with fine-grit (100-120) paper. Scrap the corners and hard to reach places, then hand sand them to blend with the rest of the floor.
You will not be able to get close to the wall behind you, so plan to start a few feet away from the back wall and sand to within a foot or so of the wall in front of you. Then turn around and sand the few feet remaining to the other wall, again starting from right to left. Take care to feather over the line where you reversed directions. Use an edger to get the area that the drum sander could not reach at walls and under counters. You may need to use a hand scraper and hand-sanding block for some areas.
After the first sanding, sweep well and change to medium grit (60-80) paper and sand again. You may choose to use a filler between sandings, usually used when refinishing old floors. If you defects that you want to cover there are some good latex fillers available. Use fine grit (100-120) sand paper for the final sanding.
As soon as you have completely sanded the floor to a level surface, vacuum thoroughly and then wipe it with tack rags. Be sure to get all the dust from not only the floor and out of the corners, but also off windowsills and mouldings. Remember to clean out any vents as well. This will prevent sawdust from falling into the finish and becoming a permanent part of your floor.
“Wash” the floor with a rag or mop that has been dampened with mineral spirits. This is an important step for heart pine. It removes any oils or resins from the surface of the wood that might prevent the finish from adhering properly. The mineral spirits will dry within a few hours, unless applied too generously.
Supplies to Have On Hand for Finishing
Penetrating oil-based sealers can be applied by hand with a rag, a brush, or a lamb’s wool applicator. Surface finishes are usually applied by applicator, or by brush in small areas.
Between coats of surface finishes you will need an abrasive nylon screen, fiber buffing pad, or steel wool to lightly sand the previous coat and help the next one adhere. Do not use steel wool if you are using a water-based finish. The steel fibers will rust and discolor the finish. If you use brushes, clean them only with water or mineral spirits. The distillates in some brush cleaners can slow the drying process.
Use a vacuum cleaner after each sanding or screening. For large areas, clean vacuum bags frequently to avoid returning any dust to the floor. You might even try wearing paper surgical booties over your shoes to avoid tracking dust. Rags with mineral spirits or water are also useful to clean up sweat, dust, dirt, or oil if any drips on the floor while you are applying the finish.
When do I Apply the Finish?
People generally prefer the natural look of finishes applied in the home over a factory baked-on finish, and most fine wood floors are sanded and finished on-site. For best results, finish the floor after the wall coverings are in place and painting is complete, except for a final touch-up coat of paint on your base moulding.
Which Finish do I Use?
- Water-based (or water-borne) urethane is a good choice for the environmentalist and is the easiest to apply. Water-based is only slightly less hard than moisture-cure, and is less likely to leave drying lines during application.
- Moisture-cure urethane is the hardest and most protective finish, but it requires the most skill to apply. Generally, it is not suggested for use by the non-professional.
- Traditional oil-modified polyurethane finishes are used today, though they will be regulated out of use in the future. Wax is generally applied on top of this finish.
- Use a penetrating oil sealer for a natural but soft finish. Buff the floor with steel wool between each coat, and then wax over the sealer. This finish may be the correct choice for some projects, but it requires extra maintenance and offers less protection.
- There are completely natural finish products available for people with chemical sensitivities or for those who want to use totally non-toxic products. Organizations specializing in the most healthful and ecological building materials are noted at the back of this booklet.
The First Coat
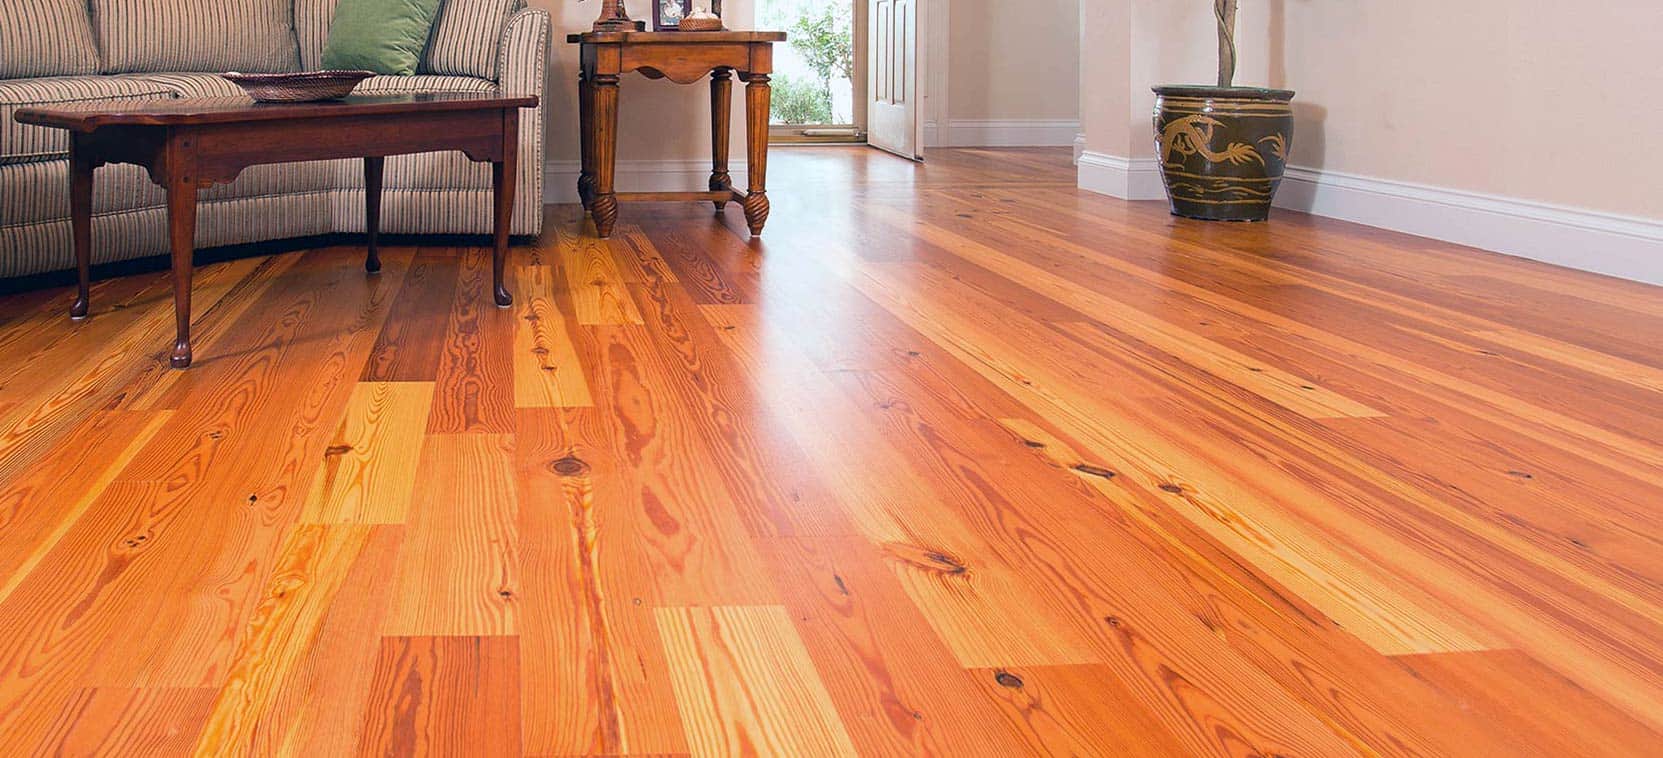
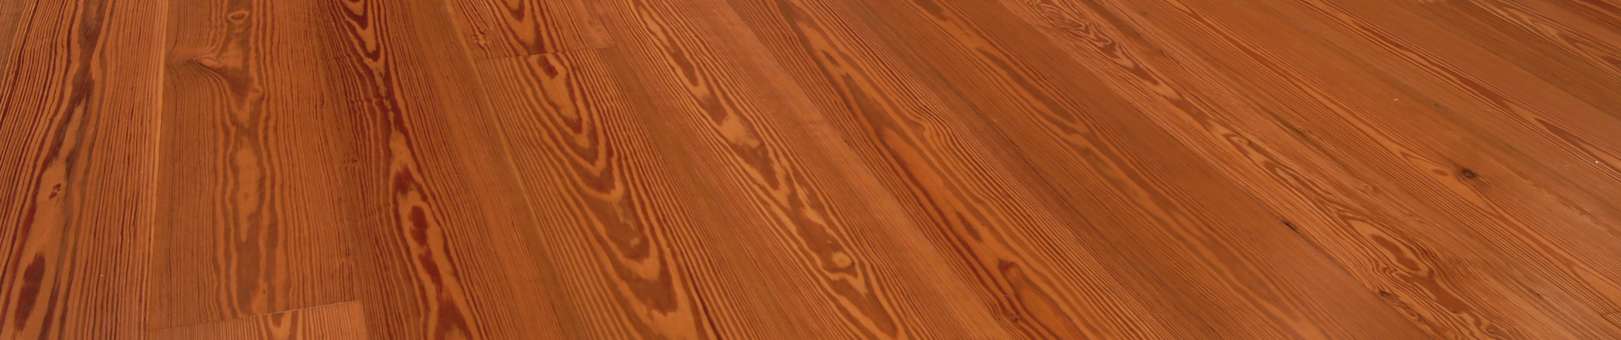
We recommend that the first coat be an oil-based sealer to help bring out the red tones for which heart pine is so famous.
The oil-based sealer is a penetrating finish and soaks into the wood, unlike surface finishes such as water-based or moisture-cured polyurethane. The real beauty of the wood can be brought out right away by one coat of the sealer.
Heart pine is renowned for its unique color and beauty. Many heart pine lovers model the late Frank Lloyd Wright who said, “I like wood left alone, for the sake of wood.” Stains may actually muddle the wood’s strong grain patterns. However, if your project has special needs you can get the sealers in wood stain colors.
The finish is applied in parallel strips across the room with the direction of the flooring. Always maintain a wet edge and use a single gliding stoke along the length of your strip, “feathering” into the previous wet area. Work toward the light so that you can see your work, but do not worry about retouching missed areas if the finish has already begun to skim over. The next coat will fill in these areas.
Make sure your floor is completely dry before you apply the second coat since the sealer soaks into the heart pine. We suggest thinning it with 1/4 to 1/3 Mineral Spirits to give it maximum penetration. It has been our experience that this coat may take longer to dry than the finish manufacturer’s directions. We often find that it takes at least 24 hours for this sealer coat to dry. One customer says, “We think the labels should read, ‘dries in four hours unless you live in Florida where it takes two days.’”
If you are in a hurry use a moisture meter to see if the floor has returned to its pre-finish moisture content. Or, check for a thumbprint by pressing your thumb firmly against the floor (see Don Bolinger’s book, Hardwood Floors, available through Fine Homebuilding magazine).
After the First Coat
You have lots of choices for the second coat of finish. Water-based is increasingly popular. It offers quick-drying time, takes little maintenance, and is simple to recoat when wear eventually begins to show. Moisture-cured and oil-modified finishes are still used a lot today, even in this low VOC (volatile organic compound) age. For a simple but soft finish, wax on top of the sealer.
We generally recommend water-based urethanes because they are safe, durable, fast drying, and offer good protection for your floor. Water-based products are being continually improved to decrease their VOC contents and increase their durability. A water-based urethane used on heart pine over an oil-based sealer applied in thin coats is a very pretty finish. It looks similar to an “oiled” or hand-rubbed finish. Some woodworkers may hate to admit this, but many know it is -true and use this to their advantage. After the first and between each succeeding coat of finish, use a floor buffer fitted with a used 100-120 grit “screen” (rub two together if you do not have a used one) or hand sand small areas. You will have to hand sand corners and edges. Lightly sand the “top” off the finish.
You do not want to sand into the finish, and one or two passes over the floor is usually enough. All that is necessary is to take the shine off the finish to help the next coat adhere to the one before it. If the finish does not “powder” while you are sanding, it is probably not dry. Vacuum the floor and any sills and baseboards. Tack the floor again, then let it dry completely, and start your next coat.
Additional tips for finishing your hardwood floors
- For the best possible adherence from coat to coat, use high-gloss for all coats except the last one. Many types of polyurethane are so hard that they do not adhere well to themselves. The high-gloss adheres best, so even if you want a satin finish use high-gloss. Use satin as your final coat and you will get the low-gloss (or semi-gloss) finish that you want with maximum adherence.
- You can apply as many coats of polyurethane as you want. Usually two or three coats is enough, but we have had people ask if they can use several coats. Just remember to let each new coat dry a little longer than the previous one.
- It is important not to wax a wood floor that has a surface finish (water-based or moisture-cured). If wax is used on these finishes, it prevents the ability to simply retouch the floor (screen or lightly sand to remove the shine and recoat it). If you wax on top of a surface finish you must sand the floor completely back to bare wood before recoating.
Special Floor Finishing Needs
If you are restoring a historic building, you may choose varnish to match an old finish. We discuss varnishes in the section on “Refinish.” We can also provide you with reprints of Old House Journal articles about historic finishes.
You might want to know about finishes for porch or outdoor floors… or how to sand a parquet floor… or even how to “pickle” your floor. There are many topics, and we can only mention the basics in this short booklet. Do not hesitate to call with questions. We will try to provide other references.
There are many companies that make excellent finish products, a few are listed in the back of this guide. No matter which finish manufacturer you choose, follow their directions carefully. These products are improving rapidly as are the ecological standards they are required to meet.
Let us know if we can provide reprints of flooring manufacturer’s association guides on finishing to further assist you.
Other Finishes
We do not mention white floors nor do we discuss finishes that contain formaldehyde in this guide. These finishes are frequently used and many professionals have a great deal of experience with them. If you need to know about them, we can recommend sources.
Maintain Your Floor
A wood floor is one of the best investments you have ever made. With proper care, it will stay beautiful and last a lifetime. How do you keep your floors as beautiful as the day they were installed or refinished? Follow these easy steps and you will have beautiful floors that always look their best. Here are some basic rules that apply to all types of finishes. With these simple steps your heart pine floor will give you lasting beauty and enjoyment.
Keep out the dirt
Dirt and grit are any floor’s enemy, whether carpet, tile, or hardwoods.
- Use dirt-trapping mats outside all exterior doors.
- Throw rugs or small carpets just inside entrances are also helpful.
- Sweep, vacuum with a brush attachment, or mop regularly as needed.
- Do not use a household dust treatment. Your floor may become slick or it may dull the finish.
Prevent damage
Avoid scratches or dents in the floor.
- Use felt or fabric-faced glides on the legs of your furniture.
- If you need casters, non-marking rubber is the best type.
- Keep high heels in good repair and replace protective shoe heel caps, exposed steel support rods in high heels will dent even concrete.
- Move area rugs occasionally and shade large west-facing windows.
When you clean
- Cleaning is different depending on the finish you choose.
- Do not use wax over a surface finish (water-borne or moisture-cure).
- You can damp mop a surface finished floor with a minimum of water or cleaner.
- Finish manufacturers often have a cleaner that is made for their finish.
- Wipe up spills quickly. Standing liquid can harm the wood and finish.
- Don’t wax too much. It can decrease luster. Buff your floor before you rewax and see if that returns the luster.
Refinish Your Floor
There are many types of floor finishes and different finishes may have been used in different rooms, so the type of care you need may vary. Your builder, realtor, or flooring professional might be able to tell you about your floor finish. Try to get the brand names of the finishing products and the name of the manufacturer if you can. Keep information about your finish in your files to help you determine the proper floor care products. Here are some things you need to know about the restoring various types of finishes.
Surface Finishes
This includes the polyurethane family. These finishes require the least effort to maintain.
For general cleaning:
- Use the manufacturer’s recommended product or just add ¼ cup of white vinegar to one quart of warm water.
- Dip a clean cloth or sponge mop and wring nearly dry.
- Clean the floor and wipe dry with a towel as you go.
- Buff to restore luster. If luster does not return in traffic areas such as doorways, kitchen sink, stove area, or hallways, the floor may require recoating. Consult your wood floor contractor, or you may apply a compatible aerosol finish to areas that show wear.
NOTE: NEVER WAX a surface finish. In most cases, wax will be slippery. Once waxed, the floor cannot be merely recoated to rejuvenate the finish, but will have to be completely sanded down to raw wood before you can refinish.
Waxed Finishes
Normally these include: oil-modified urethane finishes, a sealer coat with wax over the finish, or possibly a stain with wax.
For general cleaning:
- If the floor looks dull, buff first to see if that will restore the luster before re-waxing.
- If areas of heavy use no longer respond to buffing, wax only those areas and buff the floor to an even luster.
- NOTE: If the whole floor needs attention, clean and wax with a liquid wax and cleaner specifically for wood floors.
- You can be sure if the can says ‘Contains Petroleum distillate’ or ‘Naphtha,’ which it is specifically for wood floors.
- If your wood is stained, select the type that also contains stain.
- Follow the instructions on the label, being certain to apply evenly and wipe up any excess as you go.
- Let dry then buff to the desired luster.
Depending upon traffic, the floor should only need complete rewaxing once a year.
Historic Finishes
If your goal is to restore the floor to its original finish or to use the products of prior eras, here is some good information about the history of floor finishes.
The historic floor finishes were all surface finishes that are rarely used today and do not have the moisture-resistant characteristics of modern surface finishes. You should never damp mop a varnish, shellac, or lacquer finish. Floors finished with varnish, shellac or lacquer should be cleaned periodically with mineral spirits.
Shellac was used prior to the 1850s, but it is much too soft for a finish and it spots easily whenever a drop of water is spilled. Shellac was considered by many, however, to add to the beauty of a floor, primarily because of the warm orange color that its impurities gave to the finish.
Next came varnish, softer with longer drying times. Varnish can take weeks or even months to dry completely. It is still used today, however, on some historic floors. Spar varnish gives a high-gloss finish, tung oil a semi-gloss, and satin tung oil a low-gloss finish.
Polyurethanes came next after varnishes. You can’t really draw a line between varnishes and polyurethanes. They are all products developed from resins. Early varnish was made from natural oils, then came man-made alkyd varnish, and finally polyurethanes that are synthetic resin varnishes with drying agents added.
If you want a natural looking finish and you also need to provide protection for your historic floor, take heart! Water-borne polyurethane when used on heart pine over an oil-based sealer and applied in thin coats, can look similar to a natural oil or varnish finish.
Restoring without Refinishing
When all else fails, or you acquire a disaster floor, you can work with a type of product called ‘renovator.’ Renovator is a special class of products made by several of the finish manufacturers to help restore old floors. They do not contain any waxes and can clean off residue that may be left from oil soaps and waxy dusting compounds. These products will rejuvenate and “leave the wood with the natural glow of the original finish,” according to one manufacturer.
Renovator is for floors finished with penetrating floor products (not surface finishes). It is specially formulated to clean, restore and reseal hardwood floors, terrazzo, concrete or unglazed terra cotta tile without requiring that they be sanded first. Renovator works by softening a thin layer of the finish coating and simultaneously cleans the surface and replaces the softened layer with additional sealer.
Paint thinner (careful – it is flammable) and fine steel wool may work to partly restore old floors. Do not use the steel wool dry – work in a puddle of the thinner and wipe the floor clean as you go. Follow these simple steps to refinish your floor with paint thinner:
- After the floor is dry, apply paste wax – clear or with a stain, either liquid or solid.
- When using solid paste wax, wrap a ‘wad’ of wax in a cloth and apply a thin even coat. The warmth of your hand and the rubbing friction melts the wax.
- Buff to a luster.